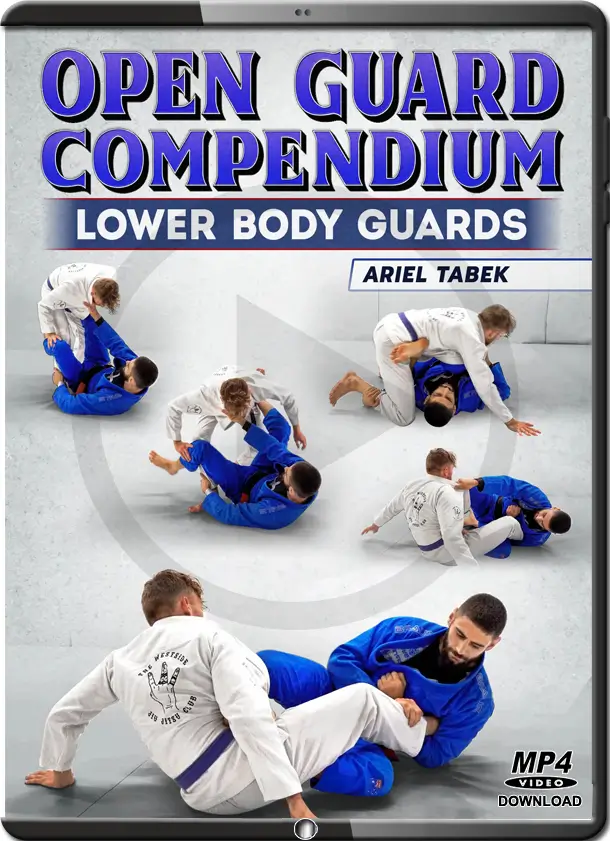
ARIEL TABAK – OPEN GUARD COMPENDIUM – LOWER BODY GUARDS
SKU: 5985$17.82
You are from Estados Unidos, price will be in Dólar americano ($).
United States dollar ($) - USD

Pague em até 12x sem cartão de crédito.
Saiba mais


Compre com o Mercado Crédito sem cartão e pague por mês
1
2
3
Crédito sujeito a aprovação.
Dúvidas? Confira nossa página de Ajuda.
- Satisfação Garantida
- Reembolsos Sem Complicações
- Pagamentos Seguros
Descrição
|
 ARIEL TABAK – OPEN GUARD COMPENDIUM
| Open Guard Compendium: Lower Body Guards. Introduction | 0:00 – 1:35 |
| Outside De La Riva (DLR) Guard | 1:35 – 1:59 |
| Components of the DLR Guard | 1:59 – 6:00 |
| Common uses | 6:00 – 7:32 |
| Frames | 7:32 – 10:32 |
| Off balancing | 10:32 – 15:53 |
| Specific goals of the DLR hook | 15:53 – 21:08 |
| How ankle to hip distance affects the grip we make on the DLR leg | 21:08 – 22:44 |
| Significance of opponent’s ankle positioning relative to your hips | 22:44 – 24:18 |
| Knee positioning with the outside DLR hook | 24:18 – 27:10 |
| Microbattles | 27:10 – 29:25 |
| DLR Guard Microbattles. Hip hinge with tricep extension | 29:25 – 30:35 |
| DLR Guard. Microbattles of non-DLR leg | 30:35 – 35:25 |
| DLR Guard Microbattles.Hip hinge with collar and pant | 35:25 – 37:30 |
| DLR: Troubleshooting Microbattles. Troubleshoot clearing hook | 37:30 – 38:14 |
| Troubleshoot clearing foot off hip | 38:14 – 38:54 |
| Troubleshoot to clearing hook by off balancing to far side | 38:54 – 40:24 |
| Troubleshoot hanging off pants with hip hinge | 40:24 – 44:17 |
| Troubleshooting opening knee | 44:17 – 46:17 |
| Troubleshoot for opening knee via attacking far leg with K guard/scoop | 46:17 – 47:39 |
| Troubleshooting late stage shin fold over DLR leg | 47:39 – 51:13 |
| Troubleshooting shinfold with X guard entry too far side off balance | 51:13 – 59:37 |
| Free foot pommelling vs opponent trying to attack/trap free foot | 59:37 + |
Volume 02
CHAPTER TITLE
START TIME
| DLR Guard. Identifying when to bail in the DLR | 0:00 – 4:03 |
| The Headquarters position / “R” Guard. Introduction and microbattles | 4:03 – 5:38 |
| Early stage prevention/retention of HQ | 5:38 – 11:33 |
| Mid/late stage HQ retention | 11:33 – 21:39 |
| Being offensive from the HQ/R guard | 21:39 – 22:36 |
| Common trends in top tier guard players | 22:36 – 24:21 |
| Overview off common off balance methods | 24:21 – 25:53 |
| Goals for off balancing | 25:53 – 27:03 |
| Microbattles | 27:03 – 28:28 |
| Grip break troubleshoot | 28:28 – 30:03 |
| Troubleshooting the folding/smash pass | 30:03 – 33:18 |
| Smash pass vs HQ. Knee positioning of DLR leg for retention and off balancing/offense | 33:18 – 35:37 |
| Retaining vs the smash with high pummel and straight collar frame | 35:37 – 38:22 |
| Positioning &orientation of trapped knee in HQ guard | 38:22 – 40:08 |
| Knowing when to bail to outside leg position | 40:08 – 40:44 |
| Early stage shin on shin pummel to enter the legs | 40:44 – 43:20 |
| HQ/R Guard. Off balancing from the HQ/R guard | 43:20 – 47:35 |
| Attacking with the HQ/R Guard | 47:35 – 49:42 |
| HQ/R Guard Attacks. Transitioning to a leg entanglement (X guard variant) from the off balance | 49:42 – 51:38 |
| How to swim the feet to the inside to transition to an X guard variant | 51:38 – 56:45 |
| Static transitions to the legs without off balancing | 56:45 + |
Volume 03
CHAPTER TITLE
START TIME
| HQ/R Guard Attacks. The Seagull Sweep | 0:00 – 1:38 |
| The importance of getting far knee to the floor for seagull sweep | 1:38 – 5:21 |
| Mechanics of the get up | 5:21 – 10:12 |
| Finishing the unfair single leg (collar + pant grips) | 10:12 – 14:42 |
| Additional sequences to add to the unfair single leg finish | 14:42 – 16:16 |
| Inside + Outside leg trip options for opponent’s who maintain a very upright posture in the single leg | 16:16 – 17:48 |
| Why we face our hips to the near side as opposed to the far side | 17:48 – 22:46 |
| Getting up against a standing opponent (far knee is off the floor) | 22:46 – 30:00 |
| Common mistakes with the standing seagull variation | 30:00 – 33:35 |
| Dealing with the hip switch/back step from the standing seagull variation | 33:35 – 36:20 |
| Re-cap of Seagull get up mechanics | 36:20 – 40:05 |
| HQ/R Guard Attacks. Entering the legs when our opponent counters the initial off balance | 40:05 – 44:44 |
| Differentiating between HQ off balance and Waiter off balance in terms of where our opponent lands | 44:44 – 45:58 |
| Comparing the foot pummeling from each type of off balance (R guard vs Waiter off balance) | 45:58 – 50:24 |
| Waiter guard from HQ microbattles | 50:24 + |
Volume 04
CHAPTER TITLE
START TIME
| HQ/R Guard Attacks. Near side HQ/R Guard attacks | 0:00 – 4:56 |
| HQ/R Guard Near side Attacks. Entering the X guard from attacking to the DLR side (near side to far side off balance) | 4:56 – 7:17 |
| Dealing with an opponent who does not take their weight to the far side (maintains their weight on the DLR side) | 7:17 – 7:52 |
| Inside Sankaku transition | 7:52 – 16:14 |
| Foot work for inside sankaku transition | 16:14 – 17:33 |
| When to triangle the legs for the inside sankaku entry | 17:33 – 20:48 |
| Using a backstep/backwards roll to transition to the inside sankaku when your opponent brings their DLR | 20:48 – 25:54 |
| Common mistakes with the inside sankaku transition + reverse X guard troubleshoot | 25:54 – 37:33 |
| Coming up to take top position with or without the inside sankaku | 37:33 – 42:42 |
| Attacking from the forwards off balance / hips to the mat balance | 42:42 – 51:24 |
| Common mistakes (hips towards mat sequence) | 51:24 – 54:46 |
| Basic modified X guard transition from scooping the far leg | 54:46 + |
Volume 05
CHAPTER TITLE
START TIME
| Attacking to the DLR Side. Outside berimbolo series | 0:00 – 1:12 |
| Attacking to the DLR side. How to initiate the outside berimbolo | 1:12 – 11:18 |
| Controlling the far leg | 11:18 – 20:31 |
| Basic baby bolo back take | 20:31 – 25:23 |
| Finishing mechanics of baby bolo | 25:23 – 26:28 |
| Hip height concept: pushing hips between your legs | 26:28 – 28:35 |
| Common mistakes with the basic baby bolo | 28:35 – 32:03 |
| Concepts of taking the back: #1 Intension of “seeing” the back | 32:03 – 32:56 |
| #2 Cross body / diagonal control concept | 32:56 – 34:48 |
| #3 Preventing trunk (torso) rotation | 34:48 – 35:57 |
| #4 Creating inside knee pressure: preventing the knee from turning towards you | 35:57 – 37:26 |
| Microbattles: Basic baby bolo sequence | 37:26 – 37:51 |
| Crab ride baby bolo variation (vs opponent clearing the top foot) | 37:51 – 42:42 |
| Details for finishing crab ride baby bolo | 42:42 – 49:51 |
| Leg drag baby bolo sequence (vs opponent clearing DLR hook) | 49:51 – 1:00:47 |
| Attacking to DLR side. Basic baby bolo vs wide base | 1:00:47 – 1:09:22 |
| Basic baby bolo vs wide base + straight collar grip frame | 1:09:22 – 1:17:46 |
| Wide base + straight collar grip frame: Duck under variation | 1:17:46 – 1:19:40 |
| Basic baby bolo vs hips to the mat (hiding back exposure) | 1:19:40 – 1:21:19 |
| Slingshot Berimbolo (Basic berimbolo) | 1:21:19 – 1:28:09 |
| Common mistakes with the Slingshot berimbolo | 1:28:09 – 1:35:25 |
| Outside berimbolo vs wide base + hips to the mat | 1:35:25 – 1:54:54 |
| Importance of elevating your hips if you lose a frame | 1:54:54 – 1:57:37 |
| Introduction to leg weave | 1:57:37 – 2:02:28 |
| Leg weave. Smashing the legs to one side to threaten back exposure | 2:02:28 – 2:06:04 |
| Ways to improve control whilst inverted | 2:06:04 – 2:11:41 |
| How to take top position | 2:11:41 – 2:17:37 |
| Passing from the leg weave. Taking back from the leg weave | 2:17:37 – 2:24:48 |
| Passing to the mount from the leg weave / top bolo position | 2:24:48 – 2:34:40 |
| Diagonal control back take from the leg weave | 2:34:40 + |
Volume 06
CHAPTER TITLE
START TIME
| Leg weave. Common mistakes with the diagonal control | 0:00 – 2:44 |
| Diagonal control back take finish from leg weave | 2:44 – 4:52 |
| Introduction to the stacked berimbolo | 4:52 – 10:20 |
| Stacked Berimbolo. Leg positioning | 10:20 – 13:34 |
| Stack drill | 13:34 – 15:33 |
| Goals to achieve during the stack | 15:33 – 18:42 |
| Finishing the back take from the stack | 18:42 – 23:42 |
| Twister hook back take | 23:42 – 37:17 |
| Different ways of stacking from the berimbolo | 37:17 – 43:33 |
| Dealing with the stiff arm frame when stacking | 43:33 – 55:45 |
| Dealing with the Re-bolo | 55:45 + |
Volume 07
CHAPTER TITLE
START TIME
| Attacking to DLR side. What to do when we lose the knee line during a Berimbolo | 0:00 – 3:19 |
| Shin behind knee position. Importance of controlling top leg | 3:19 – 5:09 |
| Importance of pinning legs to one side (single siding) | 5:09 – 5:52 |
| How to control top leg | 5:52 – 7:11 |
| Exposing the space between the calf and hamstring | 7:11 – 9:33 |
| The leg drag | 9:33 – 11:45 |
| Hook placement for shutting down the bottom leg using the leg drag | 11:45 – 14:36 |
| Common mistakes with the leg drag | 14:36 – 18:18 |
| Head positioning for the leg drag | 18:18 – 20:19 |
| Re-capturing the knee line and attacking the berimbolo | 20:19 – 22:24 |
| Stacking with the shin behind knee | 22:24 – 26:20 |
| Finishing the back take from the shin behind knee stack | 26:20 – 28:01 |
| Purpose of each drawstring grip in the shin behind knee stack | 28:01 – 31:26 |
| X’ing the body back take (inspired by Lee Ting and Tomoyuki Hashimoto) | 31:26 + |
Volume 08
CHAPTER TITLE
START TIME
| Countering the counters (Berimbolo). Mermaid mount | 0:00 – 8:36 |
| Stepping on torso introduction | 8:36 – 12:28 |
| Countering the step on torso from the stack | 12:28 – 14:15 |
| Using the shoulder lift to bypass stepping on the torso | 14:15 – 14:55 |
| Countering the counters (Shin behind knee). Stepping on torso | 14:55 – 27:02 |
| How to follow up your attacks after you address your opponent’s counter | 27:02 – 29:16 |
| Countering the counters. Spinning through to the near side X guard or shin behind knee when you can’t attach non-DLR leg to far hip | 29:16 – 35:39 |
| Dealing with the same side stiff arm when trying to connect the non-DLR foot to the far hip | 35:39 – 39:04 |
| Attacking the crab ride baby bolo from the near side X/shin behind knee entry when you can’t connect your non-DLR foot to the far hip | 39:04 – 41:42 |
| Attacking to DLR side. Using the Berimbolo to sweep | 41:42 + |
Volume 09
CHAPTER TITLE
START TIME
| Attacking to DLR side. DLR foot lock | 0:00 – 7:53 |
| DLR foot lock finishing mechanics | 7:53 – 10:43 |
| Changing to a different leg configuration if DLR leg positioning is lost | 10:43 – 12:53 |
| Berimbolo from DLR foot lock | 12:53 – 14:20 |
| Countering the scoop vs the DLR foot lock | 14:20 – 16:19 |
| DLR: Attacking to the Far Side. Waiter Guard variants | 16:19 – 17:51 |
| Attacking to Far Side. Overhook / hugging DLR | 17:51 – 19:48 |
| Transitioning to the waiter from the deep overhook | 19:48 – 28:20 |
| Overhook Waiter Guard. Using the waiter guard to enter a berimbolo sequence | 28:20 – 38:30 |
| Applying our waiter berimbolo to our standard berimbolo attacks | 38:30 – 40:00 |
| Waiter Berimbolo vs far knee to the floor (lowered base) | 40:00 – 44:42 |
| Switching to the underhook waiter + sweep/back take combination to troubleshoot the hips to mat response | 44:42 – 52:09 |
| Connecting foot to hip (high waiter guard) variation + different ways of rolling to expose the back | 52:09 – 58:56 |
| Transitioning to a leg entanglement to troubleshoot the hips all the way to the mat response | 58:56 – 1:00:22 |
| Entering a leg entanglements to counter your opponent’s scoop on your DLR leg | 1:00:22 + |
Volume 10
CHAPTER TITLE
START TIME
| Attacking to Far Side. Underhook DLR Introduction | 0:00 – 5:45 |
| Underhook DLR. Off balancing to the far side | 5:45 – 12:47 |
| Re-cap of far side off balance sequence | 12:47 – 14:31 |
| Attacking the near side to further expose the far side off balance or the back take | 14:31 – 16:27 |
| Attacking to Far Side. Dark DLR off balancing to the far side | 16:27 – 19:54 |
| Exposing the back if the knee points towards the floor | 19:54 – 21:20 |
| Forcing the somersault from excessive inside knee pressure | 21:20 – 22:20 |
| Basic far side DLR attacks | 22:20 – 24:08 |
| Advantages of using outside leg position to off balance to the far side (as opposed to inside leg position) | 24:08 – 26:26 |
| Transitioning to a leg entanglement from the fas side off balance | 26:26 – 28:17 |
| Using the far side off balance to re-expose the angle for the basic baby bolo sequence | 28:17 – 32:34 |
| Common mistakes with the far side off balance to re-exposing the basic baby bolo | 32:34 – 34:15 |
| Transitioning to the seated guard | 34:15 – 35:56 |
| Transitioning to the deep DLR guard to expose the back | 35:56 + |
Volume 11
CHAPTER TITLE
START TIME
| Reverse (Inside) De La Riva Guard. Introduction | 0:00 – 3:53 |
| RDLR/Inside DLR. Off balancing | 3:53 – 7:14 |
| Context of the RDLR (when to use this guard) | 7:14 – 10:20 |
| Fundamental retention to outside leg position | 10:20 – 13:06 |
| RDLR to K guard (near side) | 13:06 – 15:31 |
| Using the shin-on-shin hook to bring the knee to the mat or enter a leg entanglement | 15:31 – 17:20 |
| Modified X guard attack from the initial off balance | 17:20 – 20:42 |
| Wrestling up from the RDLR | 20:42 – 23:04 |
| Transitioning to a seated guard | 23:04 – 24:22 |
| Inside berimbolo / “Kiss of the Dragon” | 24:22 – 27:53 |
| Basic inside to outside berimbolo sequence | 27:53 + |