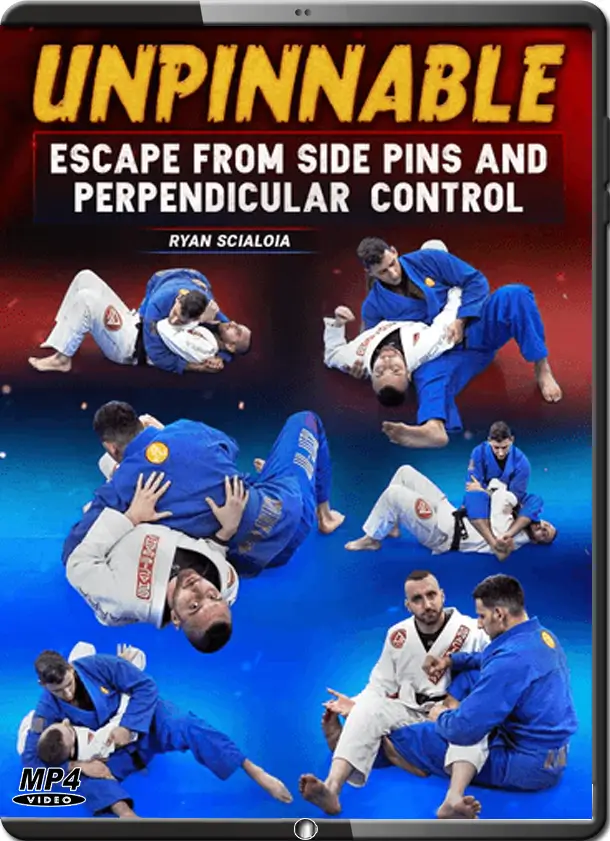
RYAN SCIALOIA – UNPINNABLE
SKU: 5432$17.76
You are from Estados Unidos, price will be in Dólar americano ($).
United States dollar ($) - USD

Pague em até 12x sem cartão de crédito.
Saiba mais


Compre com o Mercado Crédito sem cartão e pague por mês
1
2
3
Crédito sujeito a aprovação.
Dúvidas? Confira nossa página de Ajuda.
- Satisfação Garantida
- Reembolsos Sem Complicações
- Pagamentos Seguros
Descrição
|
 RYAN SCIALOIA – UNPINNABLE
| Welcome | 0:00 – 0:46 |
| Who this series will help | 0:46 – 2:39 |
| Foundational defensive responsibility | 2:39 – 3:10 |
| What topics are going to be covered perpendicular control | 3:10 – 4:30 |
| Video structure | 4:30 – 5:31 |
| What my opponent wants vs what I want | 5:31 – 7:14 |
| Wedging and inside position | 7:14 – 10:01 |
| Major concepts in this series Connection to the floor | 10:01 – 12:50 |
| Connection to your opponent. (hug them tighter) | 12:50 – 15:49 |
| Americana defense | 15:49 – 19:11 |
| Underhooks | 19:11 – 24:48 |
| Crossfaces | 24:48 – 35:21 |
| Artificial Neck | 35:21 – 37:38 |
| Thumb posting | 37:38 – 41:29 |
| 3 stages of framing | 41:29 – 44:06 |
| Elbow escape and Underhook escape (Aristotle) | 44:06 – 46:19 |
| Parallel/ Perpendicular | 46:19 – 49:42 |
| 5 steps of every pin escape | 49:42 – 53:22 |
| Shaking/ Kipping | 53:22 – 55:03 |
| Offensive cycles/ defensive cycles and submission | 55:03 – 57:24 |
| Hidden Elbow defense. | 57:24 – 1:00:01 |
| Zero sum game | 1:00:01 – 1:01:30 |
| Injury Prevention/Common Mistakes | 1:01:30 – 1:07:44 |
| Escapes and the connection to half guard | 1:07:44 – 1:09:15 |
| Doing the wrong escape | 1:09:15 – 1:11:25 |
| Changing the narrative I have you In side control | 1:11:25 – 1:13:10 |
| Helpful Quotes. Kareem Abdul jabar “You wont win until you learn how to lose.” | 1:13:10 – 1:16:12 |
| Relationship to Failure | 1:16:12 – 1:18:37 |
| Confidence in Offense | 1:18:37 – 1:20:38 |
| Essential body movements. Shrimp | 1:20:38 – 1:23:06 |
| Bridge | 1:23:06 + |
Volume 2
CHAPTER TITLE
START TIME
| Precursor to escapes: An ounce of prevention is worth a pound of cure | 0:00 – 0:21 |
| 4 points of connection. | 0:21 – 1:59 |
| Control of the collar grips. and heisting | 1:59 – 3:52 |
| Sleeve grips. control the sleeves and hold. | 3:52 – 5:18 |
| Scissor guard/Hand frames | 5:18 – 6:46 |
| Mid range/Forearm frames | 6:46 – 7:48 |
| Chest exposure | 7:48 – 9:21 |
| Kizure Kesagatame (intro and position showing) | 9:21 – 12:05 |
| 1st Escape Double thumb Posts | 12:05 – 13:57 |
| 2nd Escape Mid stage frames | 13:57 – 17:22 |
| 3rd Escape Elbow escape | 17:22 – 18:57 |
| 4th Escape armbar | 18:57 – 20:47 |
| 5th Escape Kesagatame stiff arm escape | 20:47 – 22:38 |
| 6th Escape thumb post to re elbow escape method. | 22:38 – 24:50 |
| 7th Escape thumb post to rodrigo sit up | 24:50 – 27:44 |
| 8th Escape your own hand post out to Shrimp | 27:44 – 28:57 |
| 9th Escape Squaring up to you Series | 28:57 – 30:48 |
| 10th Escape Hail mary | 30:48 – 33:35 |
| Side Control Section: Introduction and all elements | 33:35 – 37:01 |
| Strengths and Weaknesses of the position | 37:01 – 39:49 |
| Perfect Kazushi Elbow escape | 39:49 – 45:12 |
| Trilemma Elbow escape | 45:12 – 48:40 |
| Trilemma #2 escape | 48:40 – 53:49 |
| Dilemma #3 Escape | 53:49 – 56:11 |
| Elbow escaping from a different perspective | 56:11 – 1:00:00 |
| Elbow escaping the arms Underhook side | 1:00:00 – 1:02:21 |
| Elbow escaping the arms to the clamp | 1:02:21 – 1:04:22 |
| Elbow escape on Hip check | 1:04:22 – 1:08:34 |
| Further exploring options in the elbow escape | 1:08:34 + |
Volume 3
CHAPTER TITLE
START TIME
| Underhook escapes from side mount (Dogfight/Single leg) | 0:00 – 3:45 |
| Tacticts to get Underhook #1 | 3:45 – 4:33 |
| Underhook Tactic #2 | 4:33 – 5:03 |
| Underhook Tactic #3 | 5:03 – 6:01 |
| Underhook Tactic #4 | 6:01 – 7:22 |
| Underhook Tactic #5 | 7:22 – 10:11 |
| Underhook Tactic #6 | 10:11 – 11:42 |
| Bottom Dog fight Sweep | 11:42 – 15:02 |
| Dogfight Sweep Option A | 15:02 – 17:23 |
| Dogfight Sweep Option B | 17:23 – 19:25 |
| Dogfight Sweep Option C | 19:25 – 21:08 |
| Dogfight Sweep Option D | 21:08 – 23:56 |
| Putting it all together | 23:56 – 25:26 |
| Introduction to the Single leg Underhook Series | 25:26 – 29:30 |
| Single leg Captain morgan shelf (A) | 29:30 – 31:46 |
| Double leg from Behind (B) | 31:46 – 33:18 |
| Single leg collecting the knees (C) | 33:18 – 35:25 |
| Single leg Front Side (D) | 35:25 – 38:16 |
| Plethora of knowledge in this area and its one you could keep studying | 38:16 – 41:29 |
| The Stiff Arm Escape (Kizure Kesa review) | 41:29 – 42:49 |
| Preemptive stiff-arm | 42:49 – 44:26 |
| Thumbpost within Crossface | 44:26 – 46:45 |
| Transition to Reverse Kesagatame | 46:45 – 49:48 |
| Important Considerations Within Stiff-arm Escape | 49:48 + |
Volume 4
CHAPTER TITLE
START TIME
| Submission counters from Side Control | 0:00 – 1:05 |
| Clamp Guard study | 1:05 – 7:47 |
| Collar and Sleeve Guard study | 7:47 – 10:06 |
| Armbar #1 from Kizure Kesa | 10:06 – 11:33 |
| Armbar #2 Far distance Medium distance | 11:33 – 13:48 |
| Armbar #3 Armbar from close distance | 13:48 – 14:48 |
| Triangle #1 | 14:48 – 16:45 |
| Triangle #2 | 16:45 – 19:24 |
| Triangle #3 | 19:24 – 20:52 |
| Kimura #1 | 20:52 – 22:19 |
| Kimura #2 | 22:19 – 26:57 |
| Kimura #3 | 26:57 – 30:42 |
| Darce | 30:42 – 32:32 |
| Anaconda | 32:32 – 34:18 |
| Cross choke | 34:18 – 37:22 |
| Loop Choke #1 | 37:22 – 39:44 |
| Loop Choke #2 | 39:44 – 41:51 |
| Loop Choke #3 | 41:51 – 46:04 |
| Baseball Bat choke #1 | 46:04 – 48:37 |
| Baseball Bat choke #2 | 48:37 – 50:37 |
| Baseball Bat choke #3 | 50:37 + |
Volume 5
CHAPTER TITLE
START TIME
| Turning Away escapes | 0:00 – 1:10 |
| Marcelo Garcia leg Pummel 1,2,3 | 1:10 – 4:52 |
| Hip throw | 4:52 – 6:45 |
| Roll back sweep | 6:45 – 8:07 |
| Power Propping (Hand vs Elbow) | 8:07 – 10:59 |
| Recovering to Butterfly | 10:59 – 12:38 |
| Granby Roll | 12:38 – 14:13 |
| Maki Komi Roll | 14:13 – 17:00 |
| Other Variations of side Control | 17:00 – 18:27 |
| Head escape | 18:27 – 19:35 |
| Turning Away escapes | 19:35 – 20:52 |
| Elbow knee connection for other side control | 20:52 – 21:59 |
| Honorable Mentions. Roger Gracie | 21:59 – 23:51 |
| Whoever moves first loses | 23:51 – 26:08 |
| What to do if someone grabs pants | 26:08 – 31:57 |
| Reverse Kesagatame introduction | 31:57 – 34:21 |
| RK Elbow escape #1 | 34:21 – 35:57 |
| Lapel Variation | 35:57 – 37:48 |
| Rk Crucifix | 37:48 – 39:26 |
| Arm Stuck Variation | 39:26 – 40:32 |
| Arm Choke Variation | 40:32 – 42:41 |
| Invite to mount. | 42:41 – 45:52 |
| Top Crucifix Escape | 45:52 – 53:55 |
| Kesagatame Position Explained | 53:55 – 55:58 |
| Artificial Neck Defense | 55:58 – 58:20 |
| Hidden Elbow Defense | 58:20 – 1:00:42 |
| Kesagatame Off-balancing #1 | 1:00:42 – 1:02:18 |
| Kesagatame Off-balancing #2 | 1:02:18 – 1:03:31 |
| Using thumb Posting In Kesagatame to free head and arm | 1:03:31 – 1:06:06 |
| Using Headlock Escape #1 | 1:06:06 – 1:08:18 |
| Using Headlock Escape #2 | 1:08:18 – 1:11:04 |
| Using Headlock Escape #3 | 1:11:04 + |
Volume 6
CHAPTER TITLE
START TIME
| Perpendicular control that we have left | 0:00 – 2:35 |
| Deep half guard top escape | 2:35 – 4:56 |
| Deep half guard standing | 4:56 – 7:40 |
| Deep half guard #3 | 7:40 – 10:44 |
| Twister Hook counter | 10:44 – 13:38 |
| Twister Hook Miyao prevention | 13:38 – 16:40 |
| Armbar escape #1 | 16:40 – 19:38 |
| Armbar escape #2 | 19:38 – 21:50 |
| Armbar escape #3 | 21:50 – 24:59 |
| Armbar escape #4 | 24:59 – 26:35 |
| Kimura Overview and prevention | 26:35 – 32:13 |
| Kimura Elbow escape | 32:13 – 34:04 |
| Kimura Far side armbar | 34:04 – 36:53 |
| Kimura vs Single leg on the knees naïve hands | 36:53 – 39:29 |
| Kimura trap escape #1 | 39:29 – 41:58 |
| Kimura trap escape #2 into darce | 41:58 – 43:18 |
| Cross ashi Intro/safety and initial heel Slipping | 43:18 – 47:50 |
| Cross ashi using your other foot to help | 47:50 – 50:19 |
| Cross ashi Using your other foot as an interference leg | 50:19 – 52:36 |
| The Tombstone Breaking a 1-Handed Ashi Strategy | 52:36 – 54:23 |
| Hand fighting RNC Grip | 54:23 – 56:32 |
| Gangster Lean | 56:32 – 1:00:33 |
| The Classic Ashi Counter/ drill | 1:00:33 – 1:03:26 |
| Twister Hook Ashi Counter | 1:03:26 – 1:05:30 |
| Extra Ashi Escapes | 1:05:30 – 1:09:27 |
| Thank You | 1:09:27 + |