Oferta!

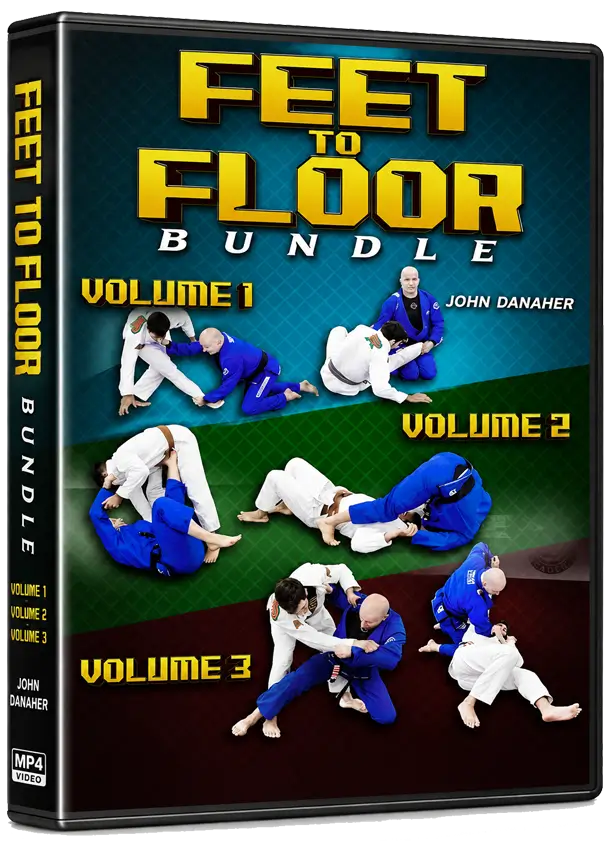
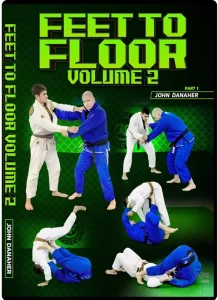
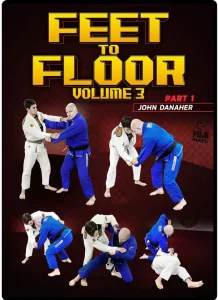
FEET TO FLOOR BUNDLE BY DANAHER

SKU: 7591

O preço original era: $40.10.O preço atual é: $29.40.

You are from Estados Unidos, price will be in Dólar americano ($).
United States dollar ($) - USD
  • United States dollar ($) - USD
  • Real brasileiro (R$) - BRL
  • Euro (€) - EUR
  • Libra esterlina (£) - GBP
  • Dólar australiano ($) - AUD
  • Dólar canadense ($) - CAD
mp-logo-hand-shake
Pague em até 12x sem cartão de crédito. Saiba mais
Compre com o Mercado Crédito sem cartão e pague por mês
1
Adicione o produto ao carrinho de compras e, na hora de pagar, selecione “Linha de Crédito”.
2
Inicie sessão no Mercado Pago.
3
Escolha o número de parcelas que melhor se adapte a você e pronto!

Crédito sujeito a aprovação.

Dúvidas? Confira nossa página de Ajuda.

  • Marca de Verificação Satisfação Garantida
  • Marca de Verificação Reembolsos Sem Complicações
  • Marca de Verificação Pagamentos Seguros
PAGAMENTO SEGURO
  • Visa Card
  • MasterCard
  • American Express
  • Discover Card
  • PayPal

Descrição

FEET TO FLOOR BUNDLE BY DANAHER

Learn Everything You Will Ever Need To Fight On Your Feet With The Best BJJ Coach On Earth – John Danaher – With This Bundle Of His Entire ‘Feet To Floor’ Series Full Of Revolutionary BJJ-Specific Concepts With Effective Takedowns And Innovative Guard Pulling Systems

  • Learn the key details to some of Brazilian Jiu-Jitsu’s most effective takedowns, as Professor John Danaher shows you how to safely and reliably take down your opponents and training partners.
  • Use throws like the Tomoe Nage, Sumi Gaeshi, Osoto Gari, Kouchi Gari, and more for maximum results with Professor Danaher’s methods.
  • Use a unique BJJ-based approach to get the fight to the floor, instead of just copying wrestling or judo, and unlock techniques and combinations you’ve never seen before.
  • Pull directly into submissions, sweeps, strong attacking positions, and more in this systematic approach with hours of detail packed in
  • Counter and stop pesky guard pullers with these techniques to keep your advantage early in top position.
  • Convert common moves from the mat to your feet, as you learn how some simple sweeps can work as takedowns and more.
  • Professor John Danaher is considered by many to be the greatest grappling coach in the world, with elite championship students like Gordon Ryan, Georges St. Pierre, and Garry Tonon.
  • Know more. Win more.

Course Content

Volume 1

The Criteria for Takedown Selection for Jiu Jitsu 4:20 – 11:35
Creating an Overall Game plan for Jiu Jitsu Students in the Standing Position 11:35 – 40:15
The First Precursor Skill of the Standing Position: Stance 40:15 – 1:00:35
The Most Important Insight You Can Gain in the Standing Position: Left & Right Stances 1:00:35 – 1:16:09
Why The Distinction Between Kenka-Yotsu & Ai-Yotsu Is So Important For Your Standing Game 1:16:09 – 1:28:44
The Second Precursor Skill of Standing Position: Fighting For A Grip – Understanding Power Hand and Control Hand 1:28:44 – 1:40:55
Gripping for a Purpose 1:40:55 – 1:49:16
The Reverse Power Hand 1:49:16 – 1:56:03
Turning the Most Common Grip Scenario to Your Advantage 1:56:03 – 2:09:06
Grip Fighting in Kenka-Yotsu to Throw An Ai-Yotsu 2:09:06 – 2:17:42
Dealing with Failure to Get Inside Position in Kenka-Yotsu Position 2:17:42 +

Volume 2

The Second Skill of Gripping: Breaking a Grip 17:27 – 39:18
Grip Fighting Strategy – Ai-Yotsu Strategy – Strategy 1 39:18 – 1:15:45
Strategy 2 1:15:45 – 1:20:44
Strategy 3 1:20:44 – 1:28:25
Strategy 4 1:28:25 – 1:33:36
Kenka-Yotsu Strategy – Strategy 1 1:33:36 – 1:40:27
Strategy 2 1:40:27 – 1:44:50
Strategy 3 1:44:50 – 1:50:15
Strategy 4 1:50:15 +

Volume 3

The Grip and Move Principle 14:31 – 19:52
The Fourth Precursor Skill of Standing Position: Kuzushi/Breaking Stance 19:52 – 24:30
The Four Golden Opportunities of Kuzushi 24:30 – 36:47
Fifth Precursor Skill Of Standing: Position 36:47 – 42:18
The 5 Minimum Requirements As You Begin Your Journey In The Standing Position – #1 Prerequisite Skills 42:18 – 56:53
#2 Front Takedowns 56:53 – 1:06:25
#3 Rear Takedowns 1:06:25 – 1:09:09
#4 Pulling Guard 1:09:09 – 1:11:22
#5 Countering a Guard Pull 1:11:22 +

Volume 4

The Power Hand and Control Hand for Collar Drag 15:37 – 27:46
The Leg Action of the Collar Drag: Uki Waza or Single Slide 27:46 – 32:40
Heavy Hand on the Cross Lapel 32:40 – 37:27
High Head 37:27 – 43:53
The Forward Rock 43:53 – 47:08
Body Position & Angle for the Collar Drag 47:08 – 51:47
The 3 Targets of the Collar Drag 51:47 – 57:12
The Greatest Disadvantage of the Collar Drag – Predictability 57:12 – 1:11:32
Attacking Off The Grip 1:11:32 – 1:14:50
Working From Grip Fight – Straight Cuff 1:14:50 – 1:20:57
Movement As a Distraction 1:20:57 – 1:24:53
Collar Drag from Kenka-Yotsu: Cuff Method 1:24:53 – 1:26:46
Collar Drag from Kenka-Yotsu: Cross Grip 1:26:46 – 1:30:03
Combining the Collar Drag with Other Attacks – Half Sasae into Collar Drag 1:30:03 – 1:33:07
Seoi Snap into Collar Drag 1:33:07 – 1:36:06
Two on One Cross Collar Snap Into Collar Drag 1:36:06 – 1:39:32
Failed Cross Osoto-Gari into Collar Drag 1:39:32 – 1:47:12
Failed Kouchi-Gari into Collar Drag 1:47:12 – 1:52:34
Failed Ankle Pick into Collar Drag 1:52:34 – 1:57:06
Double Drag 1:57:06 – 2:00:26
Working the Interface Between Feet & Floor 2:00:26 – 2:03:39
A Big Advantage of the Collar Drag Over Other Takedown Methods 2:03:39 – 2:08:26
The Great Relationship Between the Collar Drag, the Single Leg, & The Back 2:08:26 +

Volume 5

Cuff Ankle Picks 5:35 – 6:53
Inside Ankle Pick 6:53 – 8:55
Shoulder Grip Cross Ankle Pick 8:55 – 10:44
Combining Outside Pick & Inside Pick 10:44 – 12:24
Kibisu Gaeshi Floor Post 12:24 – 14:32
Why I strongly Favor The Ankle Pick For Jiu Jitsu – Overlap With Ground Grappling 14:32 – 22:08
Low Risk/High Reward 22:08 – 26:49
Ankle Pick Is Very Well Suited To Common Jiu-Jitsu Stance 26:49 – 32:14
Ankle Pick Combines Extremely Well With Guard Pulls 32:14 – 36:56
Ankle Pick Utilizes The Long End Of The Lever 36:56 – 40:03
What Do We Need To Develop A High Level Ankle Pick – There Are 2 Main Kinds Of Ankle Picks 40:03 – 43:50
Understanding Shot Hand/Shot Leg Correlation 43:50 – 47:46
Ability To Get Our Opponent To Take A Step 47:46 – 53:14
Ability To Get Opponent’s Head Over The Ankle You Are Attacking 53:14 – 56:06
Ability To Keep Opponent’s Head Same Height As Yours 56:06 – 1:02:38
Ability To Go From One Ankle To Another 1:02:38 – 1:05:49
Ability To Use Shot Hand In A Linear Fashion 1:05:49 – 1:09:07
Ability To Create A Drive Leg And Finish With A Knee Slide 1:09:07 – 1:11:27
Ankle Picking From Kenka-Yotsu 1:11:27 – 1:19:01
The Relationship Between Snap-Downs And Ankle Picks 1:19:01 – 1:28:08
Double Ankle Pick 1:28:08 – 1:34:47
High Finishes To An Ankle Pick 1:34:47 – 1:38:36
Troubleshooting The Ankle Pick – Dealing With A Stiff Arm 1:38:36 – 1:46:21
Opponent Controls Our Shot Hand 1:46:21 – 1:58:09
Opponent Plays Upright Stance 1:58:09 – 2:05:22
The Special Relationship Between Ankle Picking And Knee Picking 2:05:22 – 2:12:36
Double Leg Takedown (Morote Gari) from Ai-Yotsu – Open Position 2:12:36 – 2:19:22
Straight Cuff Flank 2:19:22 – 2:23:01
Cross Cuff Grip 2:23:01 – 2:24:28
Cross Grip 2:24:28 – 2:26:10
Armdrag 2:26:10 – 2:27:31
Using a Grip Fight to Your Advantage 2:27:31 – 2:29:01
Sleeve Lapel 2:29:01 – 2:31:16
Double Leg Takedown (Morote Gari) from Kenka-Yotsu – Cross Grip 2:31:16 – 2:34:51
Grip Break Method 2:34:51 – 2:36:46
Lapel Grip 2:36:46 – 2:39:09
Single Leg Takedown – The difference between single legs Gi & No-Gi 2:39:09 – 2:41:46
Ai-Yotsu – Lapel Single Leg 2:41:46 – 2:47:20
Dump 2:47:20 – 2:50:45
Sleeve Cuff Single 2:50:45 – 2:52:44
Double Sleeves 2:52:44 – 2:54:43
Kenka-Yotsu – One Handed Gripping 2:54:43 – 2:57:16
Knee Pick Kuchiki-Daoshi 2:57:16 – 2:59:46
Kenka-Yotsu Lapel Grip 2:59:46 – 3:07:17
Grip Fighting 3:07:17 – 3:09:50
Kuchiki-Daoshi combined with Tani-O’toshi 3:09:50 +

Volume 6

Two on One/Half Tai-Otoshi Kenka-Yotsu Situation 6:19 – 9:37
Cross Grip Snap Down Ai-Yotsu 9:37 – 13:31
Arm Trap Snap Down Kenka-Yotsu 13:31 – 16:01
Ude Gaeshi – Standard Supine Version 16:01 – 18:59
Standard Supine to an Arm Pin 18:59 – 28:53
Ude Gaeshi Cross Grip 28:53 – 33:03
Seoi Snap 33:03 – 35:41
Straight Lapel Version 35:41 – 44:33
Double Knee Drop vs Single Knee Drop 44:33 – 48:10
Troubleshooting Seoi Snap 48:10 – 53:10
Rear Takedowns 53:10 – 57:21
The Special Relationship Between Front Takedowns and Rear Takedowns 57:21 – 1:04:13
Controlling The Rear Body Lock 1:04:13 – 1:08:43
Kazushi From The Standing Rear Body Lock 1:08:43 – 1:18:18
Forward Takedowns From The Rear – Reverse Kouchi-Gari 1:18:18 – 1:24:02
Reverse Kosoto 1:24:02 – 1:34:27
Reverse De Ashi Harai 1:34:27 – 1:43:43
Reverse Ankle Pick 1:43:43 – 1:52:07
Rear Takedowns Backwards Direction – Tani-Otoshi 1:52:07 – 2:01:30
Reverse Tai Otoshi 2:01:30 – 2:14:58
Reverse Sumi-Gaeshi 2:14:58 +

Volume 7

The 3 Functions of Takedowns In Self Defense 5:47 – 10:32
Not All Self Defense Scenarios Are The Same 10:32 – 26:57
My Golden Rules For Self Defense Takedowns – #1 Don’t Go to Your Knees 26:57 – 29:13
#2 Favor Takedowns That Make It Difficult For An Opponent To Strike You Before, During, And After A Takedown 29:13 – 32:40
#3 Favor Low Amplitude Takedowns 32:40 – 38:37
#4 Favor Takedowns That Result In Your Opponent Going Down To The Ground And You Remaining On Your Feet 38:37 – 44:05
#5 Have A Couple Of High Amplitude Takedowns That Involve Crashing Your Opponent Into The Ground With Velocity 44:05 – 48:16
#6 Favor Takedowns From Behind Your Opponent 48:16 – 51:36
#7 Favor Takedowns that Don’t Rely on Clothing 51:36 – 54:44
#8 Favor Takedowns Where You Remain On Two Feet 54:44 – 59:58
#9 Favor Takedowns That Do Not Require Large Amounts of Space for Their Application 59:58 – 1:03:16
The Three Best Takedowns For Self Defense Applications – High Single Leg Ankle Block And Classic Tai Otoshi 1:03:16 +

Volume 8

Phase 2: Capture the Leg 4:45 – 17:04
Phase 3: Transfer to the High Leg 17:04 – 18:55
Head Position 18:55 – 24:59
The Instant Off Balance 24:59 – 28:26
Application From the Back 28:26 – 31:19
The Arm Drag as the Best Method of Getting Behind an Opponent 31:19 – 33:43
Special Topic: The Impact of Clothing on Self Defense Takedowns – The Relevance of Hockey Fighting to Self Defense 33:43 – 41:25
Neutral Attack Positon Screen Only Heading 41:25 – 46:12
Kenka-Yotsu Neutral Grip 46:12 – 52:29
Safety Grips Transition to Dominance 52:29 – 56:53
Advantage Front Position /Advantage Back Position/ Advantage Blind 56:53 – 1:01:12
Clothing, Takedowns & Self-Defense 1:01:12 – 1:06:35
Special Topic: SVG Theory 1:06:35 – 1:17:00
Understanding the Nuances of SVG 1:17:00 – 1:47:01
Final Reflections on Takedowns for Self-Defense 1:47:01 +
0
0
Your Cart
Your cart is emptyReturn to Shop