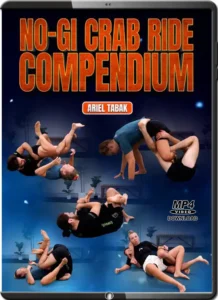
ARIEL TABAK – NO-GI CRAB RIDE COMPENDIUM
SKU: 5273$18.00
You are from Estados Unidos, price will be in Dólar americano ($).
United States dollar ($) - USD
Pague em até 12x sem cartão de crédito.
Saiba mais
- Satisfação Garantida
- Reembolsos Sem Complicações
- Pagamentos Seguros
Descrição
|
| Foreword | 0:00 – 7:38 |
| The Crab Ride Compendium – Introduction | 7:38 – 9:29 |
| What Is The Crab Ride? | 9:29 – 11:08 |
| Proper Hook Placement In The Crab Ride | 11:08 – 13:43 |
| Explanation Of Back Control | 13:43 – 18:06 |
| Hierarchy Of Goals In The Crab Ride – Goals: Exposing Calf Hamstring Space | 18:06 – 19:03 |
| Goals: Connecting Chest To Hips | 19:03 – 19:48 |
| Goals: Create Back Exposure | 19:48 – 20:31 |
| Goals: Getting Underneath Opponent (Hips On Belly Button) | 20:31 – 21:38 |
| Goals: Hip Height – Get Their Hips Below Your Hips | 21:38 – 22:08 |
| Goals: Estabilish Upper Body Control | 22:08 – 22:27 |
| Important Concepts To Consider: Progressing Head To Far Side | 22:27 – 24:58 |
| Important Concepts To Consider: Balling Up &Icecream Scoop Concept | 24:58 – 26:43 |
| Important Concepts To Consider: When To Use Extension To Apply Pressure | 26:43 – 28:49 |
| Important Concepts To Consider: Being Intentional With Keeping Hips Off Floor | 28:49 – 30:08 |
| Idea Of Constant Motion And Leg Pummelling Whilst Progressing Up The Ladder | 30:08 – 31:14 |
| Face Roll Vs Inversion: How They Affect Pressure And Hip Height | 31:14 – 33:15 |
| Using Your Knees In The Crab Ride | 33:15 – 33:57 |
| Using Your Feet To Hand Fight | 33:57 – 34:41 |
| Seesaw Concept | 34:41 – (35:46) |
Volume 2
| Maintaining The Crab Ride: Maintenance Drill 1 | 0:00 – 3:26 |
| Maintenance Drill 2: Face Roll Side Switch | 3:26 – 5:25 |
| Maintenance Drill 3: Outside Shin Pummel | 5:25 – 7:48 |
| Gripping Hierarchy | 7:48 – 11:15 |
| Gripping Combos | 11:15 – 12:09 |
| Main Approaches To Creating Back Exposure In The Crab Ride | 12:09 – 13:44 |
| Back Exposure: Into Belly Button Position for Back Exposure | 13:44 – 14:34 |
| Back Exposure: Top Leg Drag | 14:34 – 15:51 |
| Back Exposure: Butterfly Roll | 15:51 – 16:57 |
| Back Exposure: Forcing Diagonal Control | 16:57 – 18:58 |
| Back Exposure: Leg Drag Roll Through To Vertical Stack | 18:58 – 19:35 |
| Back Exposure: Leg Drag Roll Throught To Leg Pin | 19:35 – 20:12 |
| Back Exposure: X Hook | 20:12 – 21:51 |
| Back Exposure: Conveyer Belt | 21:51 – 23:11 |
| Back Exposure: Context For Conveyer Belt | 23:11 – 23:59 |
| Back Exposure: Shin Behind Knee Position | 23:59 – 24:52 |
| Back Exposure: Crab Spider Guard | 24:52 – 26:05 |
| Finishing The Back Take: Chair Sit From Turned Shoulder | 26:05 – 27:33 |
| Finishing The Back Take: Diagonal Control Finish | 27:33 – 28:21 |
| Finishing The Back Take: Vertical Stack | 28:21 – 29:27 |
| Finishing The Back Take: Leg Chop (Inserting First Hook) | 29:27 – 32:39 |
| Finishing The Back Take: The Twister Hook | 32:39 – 35:11 |
| Finishing The Back Take: Conveyerbelt Back Take | 35:11 – 36:41 |
| Idea Of Establishing A Seat Belt As Primary Goal Completing Back Take | 36:41 – 37:41 |
| Inversion Vs Face Roll | 37:41 – (38:38) |
Volume 3
| Technique Section: The Berimbolo | 0:00 – 4:27 |
| How To Get To The Wedge Berimbolo From The Crab Ride | 4:27 – 4:56 |
| Fundamental Back Take Finishes From Wedge Bolo | 4:56 – 5:58 |
| Basic Hip Escape Back Take Finish From Wedge | 5:58 – 7:48 |
| Leg Chop Finish From Wedge Bolo | 7:48 – 9:08 |
| Upper Body Control From The Wedge Bolo | 9:08 – 11:25 |
| Wedge Concept: Turning Hips Away To Create Dilemma Of Exposing Knee Line Or The Back | 11:25 – 13:23 |
| How The Wedge Bolo Translates Into The Crab Ride | 13:23 – 15:57 |
| Examples Of The Wedge Concept Implemented Into The Crab Ride | 15:57 – 16:33 |
| Wedge Concept: Implemented In The Leg Drag Hook | 16:33 – 17:15 |
| Finishing The Back Take: Chair Sit From Turned Shoulder | 17:15 – 18:25 |
| Butterfly Roll Through Sequence | 18:25 – 23:31 |
| Restacking If You Lose Hip Height Or Back Exposure | 23:31 – 24:59 |
| Pendulum/Spiral Restack | 24:59 – 27:06 |
| The Vertical Stack | 27:06 – 33:07 |
| Restacking Using The Shin Behind Knee | 33:07 – 33:40 |
| Mechanics For Maintaining The Vertical Stack | 33:40 – 35:04 |
| Finishing The Back Take From The Vertical Stack | 35:04 – (35:56) |
Volume 4
| The Leg Drag Hook | 0:00 – 1:48 |
| Using The Leg Drag Hook In Crab Ride | 1:48 – 4:11 |
| Mechanics Of The Leg Drag Hook | 4:11 – 6:06 |
| Common Responses To The Leg Drag Hook | 6:06 – 8:19 |
| X Hook Sequences From The Roll Through | 8:19 – 9:32 |
| Dealling With Building Up To An Elbow Response | 9:32 – 11:14 |
| Connecting To A Wedge Crab Ride From The Roll Through | 11:14 – 13:13 |
| Top Side Twister Hook (Aka The Hammer Down) | 13:13 – 15:27 |
| No-Hook Bolo/Stump Bolo From Leg Weave Position | 15:27 – 17:38 |
| Attacking The Leg Drag | 17:38 – 18:51 |
| Using The Leg Drag Hook To Set Up The Vertical Stack | 18:51 – 19:21 |
| The X Hook | 19:21 – 26:23 |
| X Hook Top Leg Drag Roll Through Dilemma | 26:23 – 28:00 |
| X Hook Spiral/Pendulum To Re-Expose The Back | 28:00 – 31:52 |
| X Hook: Conveyer Belt Back Take | 31:52 – (38:46) |
Volume 5
| Shin Behind Knee Position And Introduction To Seesaw Mechanic | 0:00 – 5:54 |
| Shin Behind Knee Misdirecting The Hips | 5:54 – 8:13 |
| Shin Behind Knee Misdirect The Hips: Backwards Roll | 8:13 – 11:15 |
| Seesaw Concept Using Misdirection Of Hips | 11:15 – 12:53 |
| Miscellaneous Techniques: Cross Wrist Control Back Take | 12:53 – 16:38 |
| Hip Switch Back Take | 16:38 – 19:56 |
| Lower Calf Stomp Machanic For Stacking | 19:56 – 21:26 |
| Troubleshooting Common Reactions To The Crab Ride | 21:26 – 21:46 |
| Leg Pummelling And Stepping On Torso | 21:46 – 24:09 |
| Counter To Step Using Outside Shin Behind Knee Pummel | 24:09 – 27:00 |
| Counter To Step Using Matrix Or Outside Calf Slicer Hook | 27:00 – 29:39 |
| Countering The Step Using The Seesaw Concept | 29:39 – 31:19 |
| Combining All Of The Counters Together To Beat The Step | 31:19 – 32:13 |
| Same Side Shoulder Stiff Arm Counter | 32:13 – (33:01) |
Volume 6
| The Plank | 0:00 – 0:52 |
| Single Leg Bridge Restack To Counter The Plank | 0:52 – 1:58 |
| Spiral Pendulum Restack To Counter The Plank | 1:58 – 2:56 |
| Hand Fighting And Repummelling Counter | 2:56 – 3:44 |
| Countering The Hand Fight By Stapling The Bicep With Your Crab Ride Hooks | 3:44 – 6:42 |
| The Wrench (Pulling The Crab Ride Leg Through To Attack The Legs) | 6:42 – 7:11 |
| Counters To Having Your Leg Pulled Through From Crab Ride | 7:11 – 10:30 |
| Prevention Against The Wrench: Using An Inversion To Draw Your Hip And Your Knee Away From Your Opponent | 10:30 – 11:04 |
| Setting Up Response (Resisting Shoulders To Mat) | 11:04 – 13:15 |
| Following Up Conveyer Belt With Stack | 13:15 – 13:42 |
| Everyday Porrada Response And How To Counter | 13:42 – 16:32 |
| Entries To The Crab Ride | 16:32 – 17:45 |
| Double Pull Entries | 17:45 – 19:09 |
| Entries From Leg Attacks From Double Pull | 19:09 – 22:28 |
| Entering From Top Position Vs Leg Entanglements | 22:28 – 23:38 |
| Entering Vs Outside Ashi With Overwrap/Achilles Grip | 23:38 – 27:14 |
| Entering Vs Slx/Irimi Ashi | 27:14 – 30:52 |
| Entering Vs 5050 | 30:52 – 32:44 |
| Entering Vs K Guard | 32:44 – 39:39 |
| Entering From Guard Inside Spin From Body X | 39:39 – 42:30 |
| Entering From The Outside Waiter Guard | 42:30 – 44:36 |
| Entering From The Matrix | 44:36 – (46:55) |
Volume 7
| Idea Of Using Knees To Stack Opponent | 0:00 – 1:49 |
| When To Bail On The Crab Ride: Introduction To The Cross Scoop | 1:49 – 9:49 |
| The Chopstick (Reference To Levi X Taza Wno 2021) | 9:49 – 16:04 |
| Entering The Legs: Outside Sankaku Entry | 16:04 – 19:03 |
| Saddle Entry | 19:03 – 20:45 |
| Cross Scoop To Saddle | 20:45 – 22:21 |
| Estima Lock Entry And Finish From The Stepping Defence | 22:21 – 25:20 |
| Intro To Crab Riding The Arms: Armbar Off Bicep Pin | 25:20 – 28:37 |
| Face Roll From The Bicep Pin | 28:37 – 31:45 |
| Arm X Vs Building Up To An Elbow | 31:45 – 35:04 |
| The Xanadu Guard – Credit To Levi Jones Leary | 35:04 – (38:02) |
Volume 8
| Sparring Footage And Commentary | 0 – (44:10) |


 ARIEL TABAK – NO-GI CRAB RIDE COMPENDIUM


