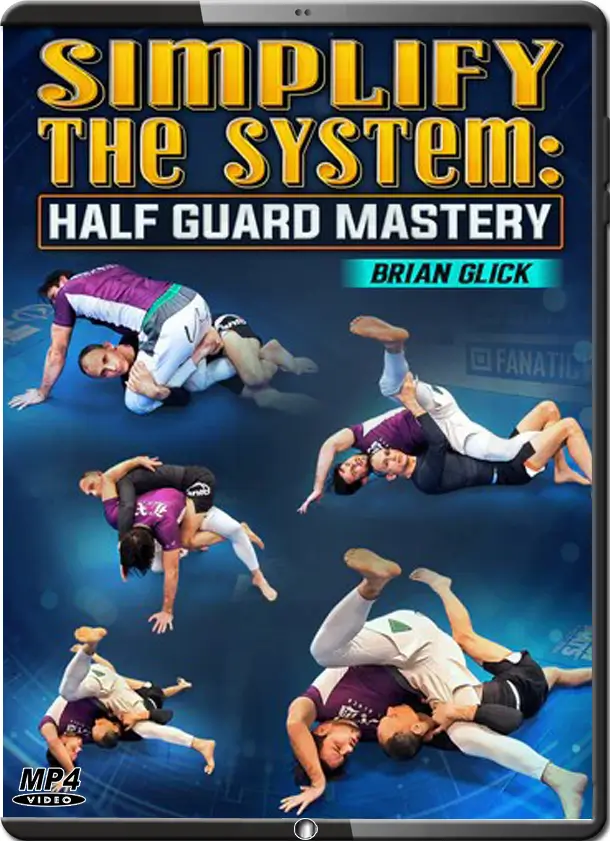
BRIAN GLICK – SIMPLIFY THE SYSTEM – HALF GUARD MASTERY
SKU: 005377$17.70
You are from Estados Unidos, price will be in Dólar americano ($).
United States dollar ($) - USD
Pague em até 12x sem cartão de crédito.
Saiba mais
- Satisfação Garantida
- Reembolsos Sem Complicações
- Pagamentos Seguros
Descrição
|
| Dedication | 0:00 – 2:10 |
| Why Half Guard | 2:10 – 7:14 |
| Intro to Half Guard: Concepts and Principles – Posture | 7:14 – 10:50 |
| Inside Position | 10:50 – 14:03 |
| Managing Distance | 14:03 – 16:32 |
| Head Position | 16:32 – 19:11 |
| Our Focus in This Video | 19:11 – 24:02 |
| How to Use This Video | 24:02 – 25:49 |
| 3 Essential Skills to Make Your Half Guard Work – The Skill of the Lower Leg Shift | 25:49 – 32:47 |
| The Skill of the Knee Lever | 32:47 – 37:20 |
| The Skill of Shelfing the Leg | 37:20 – 43:45 |
| Entries to the Half Guard: Pin Escapes | 43:45 – 55:44 |
| Entries to the Half Guard: Guard Position | 55:44 + |
Volume 2
| Section 1: Tight-Waist Trilemma – Roll Through Sweep – Preliminaries: Lower Leg Shift Mechanics | 0:00 – 7:02 |
| Roll-Through Sweep | 7:02 – 16:56 |
| Problem #1: Addressing the Posted Arm | 16:56 – 22:26 |
| Problem #2: Addressing the Posted Leg | 22:26 – 26:26 |
| Problem #3: Addressing the Guillotine Threat | 26:26 – 33:50 |
| Hiza Gatame – Setup and Mechanics | 33:50 – 39:12 |
| Topside Finish | 39:12 – 43:06 |
| Ankle Pick – The Sweep: Controlling the Foot | 43:06 – 48:35 |
| Walk-Around Mechanics | 48:35 – 54:10 |
| Shelfing the Leg | 54:10 – 1:01:13 |
| Outside Knee Pick | 1:01:13 – 1:06:29 |
| Roll-Through (with Momentum) | 1:06:29 + |
Volume 3
| Duck Under – Importance of Head Position | 0:00 – 6:15 |
| Lat Post and Keeping Weight on the Hands | 6:15 – 11:53 |
| Troubleshooting the Tight Waist – Problem #1: Addressing the Strong Whizzer | 11:53 – 16:56 |
| Problem #2: Addressing the Knee Cut | 16:56 – 22:51 |
| Problem #3: Addressing the Back-Step | 22:51 – 30:17 |
| Integrating Tight-Waist Skills – Example #1: Roll Through Sweep to Ankle Pick to Roll Through | 30:17 – 34:55 |
| Example #2: Roll Through Sweep to Duck Under to Outside Scoop | 34:55 – 38:15 |
| Example #3: Roll Through Sweep to Ankle Pick to Roll Though to Duck Under | 38:15 + |
Volume 4
| Section 2: Knee Lever – Mechanics and Posture | 0:00 – 11:10 |
| Knee Lever from Chest to Chest – Knee Lever to Clamp | 11:10 – 17:15 |
| Knee Lever to Tight Waist | 17:15 – 21:31 |
| Knee Lever to Leg Attacks | 21:31 – 28:17 |
| Alternative Grips for the Knee Lever – 2 on 1 | 28:17 – 36:08 |
| 1 on 1 | 36:08 – 40:54 |
| Managing the Scramble – Using the Top Arm to Post | 40:54 – 46:19 |
| Importance of Head Height | 46:19 – 49:53 |
| Troubleshooting the Knee Lever – Solution #1: Double Knee Lever | 49:53 – 56:11 |
| Solution #2: Sumi Gaeshi | 56:11 + |
Volume 5
| Section 3: Side by Side (Tight Waist Vs Whizzer) – Understanding the Position -Tight Waist Vs Whizzer | 0:00 – 7:13 |
| Hip Height | 7:13 – 9:34 |
| Knee Position | 9:34 – 13:49 |
| Limp Arm – Shoulder Position | 13:49 – 19:20 |
| Using the Knee | 19:20 – 22:52 |
| Kosoto Circle – Posture and Stability | 22:52 – 28:43 |
| Sweeping the Knee | 28:43 – 32:42 |
| Step-Around – Knee Method | 32:42 – 38:09 |
| Leg Method | 38:09 – 43:23 |
| Body Lock – Draw Down | 43:23 – 50:28 |
| Overwrap (Cow Catcher) | 50:28 – 55:14 |
| Back Take | 55:14 – 1:02:56 |
| Outside Scoop Series | 1:02:56 – 1:11:04 |
| Single Leg – Intro to Single Leg | 1:11:04 – 1:18:16 |
| Backside Single | 1:18:16 – 1:25:18 |
| Outside Scoop Review | 1:25:18 – 1:29:20 |
| Limp Arm | 1:29:20 – 1:33:27 |
| Standing with the Single | 1:33:27 + |
Volume 6
| Section 4: Troubleshooting Half Guard – Managing the Sit-Out – Reverse Underhook | 0:00 – 12:11 |
| Reverse Overhook | 12:11 – 21:37 |
| Smashed Positions – Flattened Chest to Chest | 21:37 – 27:45 |
| Kipping to Knee Shield | 27:45 – 34:16 |
| Smashed Knee Shield – Recovering to Clamp | 34:16 – 39:54 |
| Roll-Through Variation | 39:54 + |
Volume 7
| Study Guide – Intro to Half Guard: Concepts and Principles | 0:00 – 2:02 |
| 3 Essential Skills to Make Your Half Guard Work – Lower Leg Shift Basics | 2:02 – 3:10 |
| Knee Lever | 3:10 – 4:07 |
| Shelfing the Leg | 4:07 – 5:19 |
| Entries to the Half Guard: Pin Escapes | 5:19 – 8:20 |
| Entries to the Half Guard: Guard Position | 8:20 – 11:27 |
| Section 1: Trilemma Series – Roll Through Sweep – Mechanics | 11:27 – 13:29 |
| Hiza Gatame | 13:29 – 15:41 |
| Problem #1: Addressing the Posted Arm | 15:41 – 16:32 |
| Problem #2: Addressing the Posted Leg | 16:32 – 17:48 |
| Problem #3 Guillotine Attacks | 17:48 – 19:23 |
| Ankle Pick – The Sweep: Controlling the Foot | 19:23 – 20:46 |
| Walk-Around Mechanics | 20:46 – 21:59 |
| Shelfing the Leg | 21:59 – 23:31 |
| Outside Knee Pick | 23:31 – 25:09 |
| Roll Through (with Momentum) | 25:09 – 26:16 |
| Duck Under | 26:16 – 28:25 |
| Troubleshooting the Tight Waist – Problem #1: Addressing the Strong Whizzer | 28:25 – 29:33 |
| Problem #2: Addressing the Knee Cut | 29:33 – 30:32 |
| Problem #3: Addressing the Back-Step | 30:32 – 32:48 |
| Section 2: Knee Lever – Knee Lever from Chest to Chest | 32:48 – 34:19 |
| Knee Lever to Clamp | 34:19 – 35:32 |
| Knee Lever to Tight Waist | 35:32 – 36:43 |
| Knee Lever to Leg Attacks | 36:43 – 38:26 |
| Alternative Grips for the Knee Lever | 38:26 – 41:15 |
| Managing the Scramble | 41:15 – 43:50 |
| Addressing the Elevated Knee | 43:50 + |
Volume 8
| Section 3: Side by Side (Tight Waist Vs Whizzer) – Understanding the Position: Arms, Knees and Hips | 0:00 – 2:49 |
| Limp Arm | 2:49 – 4:08 |
| Kosoto Circle | 4:08 – 5:29 |
| Step-Around | 5:29 – 7:38 |
| Body Lock – Draw Down | 7:38 – 9:06 |
| Over Wrap (Cow Catcher) | 9:06 – 10:21 |
| Back Take | 10:21 – 11:44 |
| Outside Scoop Series | 11:44 – 13:43 |
| Single Leg – Backside Single | 13:43 – 15:47 |
| Limp Arm | 15:47 – 16:44 |
| Standing with the Single | 16:44 – 18:04 |
| Section 4: Troubleshooting Half Guard – The Sitout – Reverse Underhook | 18:04 – 20:37 |
| Reverse Overhook | 20:37 – 21:55 |
| Smashed Positions – Flattened Chest to Chest | 21:55 – 22:57 |
| Smashed Knee Shield | 22:57 + |


 BRIAN GLICK – SIMPLIFY THE SYSTEM – HALF GUARD MASTERY


