
BRIAN GLICK – SIMPLY THE SYSTEM – SUMI GAESHI
SKU: 5154$17.76
You are from Estados Unidos, price will be in Dólar americano ($).
United States dollar ($) - USD
Pague em até 12x sem cartão de crédito.
Saiba mais
Compre com o Mercado Crédito sem cartão e pague por mês
1
2
3
Crédito sujeito a aprovação.
Dúvidas? Confira nossa página de Ajuda.
- Satisfação Garantida
- Reembolsos Sem Complicações
- Pagamentos Seguros
Descrição
|
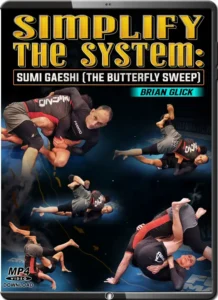 BRIAN GLICK – SIMPLY THE SYSTEM – SUMI GAESHI
| Dedication | 0:00 – 2:38 |
| Why Sumi Gaeshi | 2:38 – 8:01 |
| Our Focus In This Video | 8:01 – 12:02 |
| How To Use This Video | 12:02 – 14:10 |
| How It Works: Mechanics Of Sumi Gaeshi – Shoulder Position | 14:10 – 18:30 |
| Head To Floor | 18:30 – 21:17 |
| Role Of The Legs In Sumi | 21:17 – 28:19 |
| Why Does Your Sumi Gaeshi Fail – Direction | 28:19 – 32:00 |
| Posture | 32:00 – 35:34 |
| Transition | 35:34 – 38:25 |
| Follow Up | 38:25 – 42:16 |
| 3 Essential Skills To Make Sumi Work – Essential Skill #1: How (And Why) To Forward Shift | 42:16 – 48:32 |
| Essential Skill #2: How (And Why) To Use A Drive Leg | 48:32 – 53:31 |
| Essential Skill #3: How (And Why) To Use Hiza Garuma And Double Directionality | 53:31 + |
Volume 2
| Section 1: Grips At Distance – 2 On 1 Wrist – Sumi/Hiza Guruma | 0:00 – 7:45 |
| Ashi Entry | 7:45 – 12:50 |
| Forward Shift | 12:50 – 16:56 |
| Elbow 2 On 1 – Sumi/Hiza Guruma | 16:56 – 21:44 |
| Ashi Entry | 21:44 – 24:49 |
| 2 On 1 Pass By | 24:49 – 28:38 |
| Arm Drag – Arm Trap Sumi Gaeshi | 28:38 – 32:37 |
| Sumi/Hiza Guruma | 32:37 – 38:10 |
| Ashi | 38:10 – 41:01 |
| Overwrap Sumi Gaeshi | 41:01 – 44:38 |
| Collar Tie – Sumi Gaeshi | 44:38 – 51:52 |
| Head And Arm (Arm-In Guillotine) | 51:52 – 56:30 |
| Chancery Turnover | 56:30 – 59:07 |
| Integrating Skills – Intro to How to Integrate Skills | 59:07 – 1:02:21 |
| 2 On 1 Wrist | 1:02:21 – 1:07:51 |
| Elbow 2 On 1 | 1:07:51 – 1:10:43 |
| Arm Drag | 1:10:43 – 1:14:46 |
| Collar Tie | 1:14:46 + |
Volume 3
| Section 2: Grips At Close Range – Intro | 0:00 – 4:00 |
| Over Under – Establishing Over Under Grips | 4:00 – 11:43 |
| Sumi Gaeshi | 11:43 – 16:34 |
| Hiza Guruma | 16:34 – 21:23 |
| Clearing The Elbow | 21:23 – 28:34 |
| Ashi Garami | 28:34 – 32:08 |
| Double Unders – Establishing Double Underhooks | 32:08 – 38:01 |
| Locked Hands Vs. Open Hands – Pros And Cons | 38:01 – 41:26 |
| Sumi Gaeshi/Hiza Guruma | 41:26 – 46:23 |
| Body Lock Reversal | 46:23 + |
Volume 4
| Double Overhooks: Working With The Body Lock Pass – Early Defense | 0:00 – 5:52 |
| Mid Stage Defense | 5:52 – 9:54 |
| Late Stage Defense | 9:54 – 15:24 |
| Overhook (The Whizzer) – Acquiring The Overhook | 15:24 – 20:57 |
| Sumi Gaeshi | 20:57 – 25:35 |
| Figure 4 Grip And Hiza Guruma | 25:35 – 32:38 |
| Multi Directional Sweeps | 32:38 – 37:24 |
| Essential Upper Body Submissions | 37:24 – 46:07 |
| Heisting | 46:07 + |
Volume 5
| Section 3: Special Cases – Yoko Sumi Gaeshi – Intro To Yoko Sumi Gaeshi | 0:00 – 4:19 |
| Single Leg Entry | 4:19 – 9:04 |
| Guillotine Entry | 9:04 – 12:56 |
| Overhook Entry | 12:56 – 17:07 |
| Spiral Sumi Gaeshi – Grip And Body Position | 17:07 – 22:42 |
| Spiral Sumi | 22:42 – 27:02 |
| Spiral Sumi To Cross Ashi | 27:02 – 30:32 |
| Section 4: Complimentary Attacks – Pinch Headlock – Entry To Pinch Headlock | 30:32 – 35:49 |
| Principle Of The High Elbow | 35:49 – 39:10 |
| Multi Directional Sweeping | 39:10 – 45:51 |
| Shoulder Crunch – From Pinch Headlock To Shoulder Crunch | 45:51 – 52:09 |
| Importance Of Head Position | 52:09 – 54:29 |
| Multi Directional Sweeping | 54:29 – 58:21 |
| Shoulder Crunch To Triangle | 58:21 – 1:01:54 |
| Ashi Garami – Dilemma: Extension Or Retraction | 1:01:54 + |
Volume 6
| Study Guide – Section 1: Grips At Distance – 2 On 1 Wrist – Sumi/Hiza Guruma | 0:00 – 1:38 |
| Ashi Entry | 1:38 – 2:30 |
| Forward Shift | 2:30 – 3:29 |
| Elbow 2 On 1 – Sumi/Hiza Guruma | 3:29 – 5:05 |
| Ashi Entry | 5:05 – 6:13 |
| 2 On 1 Pass By | 6:13 – 7:34 |
| Arm Drag – Sumi/Hiza Guruma | 7:34 – 9:11 |
| Ashi | 9:11 – 10:35 |
| Overwrap Sumi Gaeshi | 10:35 – 11:55 |
| Arm Trap Sumi Gaeshi | 11:55 – 13:22 |
| Collar Tie – Sumi Gaeshi | 13:22 – 14:53 |
| Head And Arm (Arm-In Guillotine) | 14:53 – 16:56 |
| Chancery Turnover | 16:56 – 18:23 |
| Section 2: Grips At Close Range – Over Under – Establishing Over Under Grips | 18:23 – 19:36 |
| Sumi Gaeshi | 19:36 – 20:49 |
| Hiza Guruma | 20:49 – 22:19 |
| Clearing The Elbow | 22:19 – 24:00 |
| Ashi Garami | 24:00 – 25:18 |
| Double Unders – Establishing Double Underhooks | 25:18 – 26:48 |
| Sumi Gaeshi/Hiza Guruma | 26:48 – 28:18 |
| Body Lock Reversal | 28:18 – 29:20 |
| Double Overhooks: Working With The Body Lock Pass – Early Defense | 29:20 – 30:45 |
| Mid Stage Defense | 30:45 – 32:20 |
| Late Stage Defense | 32:20 – 33:55 |
| Overhook (The Whizzer) – Acquiring The Overhook | 33:55 – 35:12 |
| Sumi Gaeshi | 35:12 – 37:02 |
| Figure 4 Grip And Hiza Guruma | 37:02 – 39:10 |
| Multi Directional Sweeps | 39:10 – 40:21 |
| Te Gatame | 40:21 – 41:59 |
| Heisting | 41:59 – 44:06 |
| Section 3: Special Cases – Yoko Sumi Gaeshi – Single Leg Entry | 44:06 – 45:53 |
| Guillotine Entry | 45:53 – 47:39 |
| Overhook Entry | 47:39 – 49:11 |
| Spiral Sumi Gaeshi – Spiral Sumi | 49:11 – 51:17 |
| Spiral Sumi To Cross Ashi | 51:17 – 52:42 |
| Section 4: Complimentary Attacks – Pinch Headlock – Entry To Pinch Headlock | 52:42 – 54:36 |
| Principle Of The High Elbow | 54:36 – 55:20 |
| Multi Directional Sweeping | 55:20 – 56:55 |
| Shoulder Crunch – From Pinch Headlock To Shoulder Crunch | 56:55 – 58:01 |
| Multi Directional Sweeping | 58:01 – 59:51 |
| Shoulder Crunch To Triangle | 59:51 – 1:01:12 |
| Ashi Garami – Dilemma: Extension Or Retraction | 1:01:12 + |