KENNET EKELUND WAALE – THE EVOLVED EZEKIEL
SKU: 7548

$17.76

You are from Estados Unidos, price will be in Dólar americano ($).
United States dollar ($) - USD
  • United States dollar ($) - USD
  • Real brasileiro (R$) - BRL
  • Euro (€) - EUR
  • Libra esterlina (£) - GBP
  • Dólar australiano ($) - AUD
  • Dólar canadense ($) - CAD
mp-logo-hand-shake
Pague em até 12x sem cartão de crédito. Saiba mais
Compre com o Mercado Crédito sem cartão e pague por mês
1
Adicione o produto ao carrinho de compras e, na hora de pagar, selecione “Linha de Crédito”.
2
Inicie sessão no Mercado Pago.
3
Escolha o número de parcelas que melhor se adapte a você e pronto!

Crédito sujeito a aprovação.

Dúvidas? Confira nossa página de Ajuda.

  • Marca de Verificação Satisfação Garantida
  • Marca de Verificação Reembolsos Sem Complicações
  • Marca de Verificação Pagamentos Seguros
PAGAMENTO SEGURO
  • Visa Card
  • MasterCard
  • American Express
  • Discover Card
  • PayPal

Descrição

KENNET EKELUND WAALE – THE EVOLVED EZEKIEL
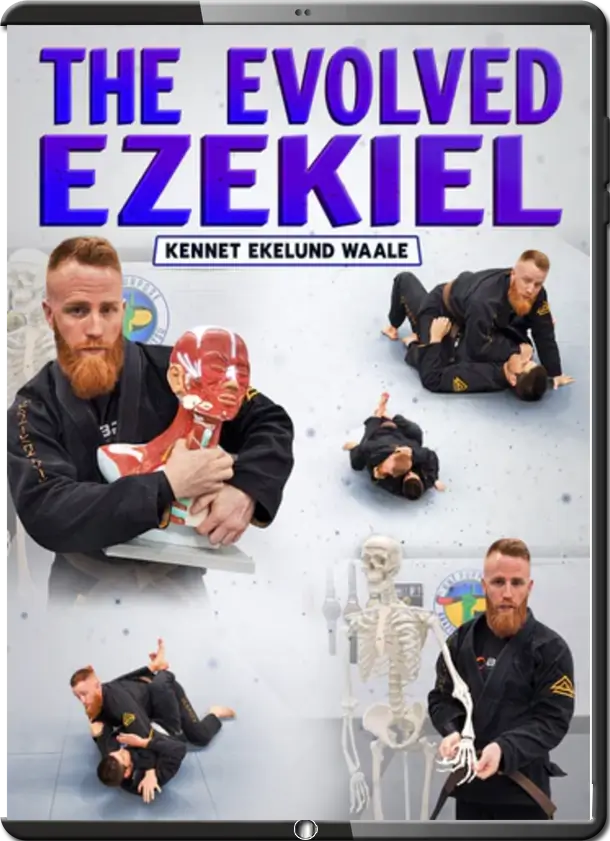
The Evolved Ezekiel by Kennet Ekelund Waale

Attack The Ezekiel Choke In A Whole New Way, As Kennet Ekelund Waale Teaches A Mastercourse In How To Add This Underused Choke To Your Submission Arsenal

  • This 4-part series breaks down in extreme detail how to use the ezekiel choke to its maximum, with a focus on concepts and the functional mechanics of the choke
  • See what makes the Ezekiel work as Kennet teaches you how to apply the choke from the most useful positions and get the tap against tough resistance and escape attempts
  • Work from the top and bottom of mount with Kennet’s guide to staying safe, controlling and breaking frames, and using each position as a chance to attack the Ezekiel
  • Use variations of the Ezekiel like the Soul Crusher, the Torque Ezekiel, the Alarm Bell Ezekiel, and more to widen your game and give yourself the most options
  • Kenneth teaches you how to best acquire new skills in this area, giving you submissions and games that will help you improve faster

Course Content

Volume 1

Introduction to Mount – Introduction 0:00 – 0:42
The Principle of Association and Disassociation 0:42 – 1:41
The Neck is Designed for Movement 1:41 – 3:01
How to Leverage the Practical Anatomy of the Shoulder to Maximize Control and Strangles 3:01 – 4:20
Staying Safe in Bottom Mount – Introduction 4:20 – 4:55
The Principle of Off-Balancing Opponents to Stay Safe 4:55 – 6:05
Using the Three-Quarter Bridge to Save Energy 6:05 – 7:30
T-Rex Arm + Neck Shrug = True, when Staying Safe 7:30 – 7:44
A Practical Example of the Three-Quarter Bridge 7:44 – 8:39
The Three-Quarter Bridge is Association in Practice 8:39 – 9:54
Controlling Low Mount – Introduction 9:54 – 10:33
Anatomical Mount – How to “Super Glue” Yourself to The Opponent So You Never Lose Mount Position 10:33 – 11:38
The concept of “Hide, Pinch and Hover” 11:38 – 12:44
The power of “tucking your hips under” 12:44 – 13:17
A Practical Example of the Anatomical Mount Concepts 13:17 – 14:55
A Brief Summary for When You’re Panicking and Don’t Remember What To Do 14:55 – 15:31
The Anatomy of Mount Frames – Introduction 15:31 – 16:00
The importance of levers when breaking mount frames 16:00 – 17:24
Disassociating the Elbow from the Torso and Controlling the Ribcage 17:24 – 17:53
Our main goal in top mount – Dividing the Upper and Lower Bodies 17:53 – 18:58
Breaking Mount Frames Part 1 – Using Hips & Lock Method – Introduction 18:58 – 19:29
The Hip Push Method of Breaking Frames 19:29 – 20:56
Introduction to The Lock Method of Breaking Frames 20:56 – 24:56
“Opening the Lock” Using Your Hands and The Reverse Palm Option 24:56 – 25:51
Summary of The Mount Position and Concepts of Breaking Frames 25:51 – 27:52
Breaking Mount Frames Part 2 – Using The Choke Threat & Leg Twist – Introduction 27:52 – 28:39
The importance of Applying Cross-Face Pressure in The Correct Direction 28:39 – 29:59
Threatening a Choke to Open The Mount Frame 29:59 – 31:26
Threatening The “Leg Twist” to Open The Mount Frame 31:26 – 32:26
Threatening The “Leg Twist” + “Lock Method” Combination to Open The Mount Frame 32:26 – 33:29
Summary of 4 Primary Ways of Breaking Mount Frames 33:29 – 34:53
The Strength of The Three-Quarter Bridge – Introduction 34:53 – 35:22
A Strong Cross-Face and Lock Break Prevents The Upa-Escape 35:22 – 36:45
The Principle of The Three-Quarter Bridge in Action 36:45 – 37:52
How to Use The Three-Quarter Bridge to Escape a Tough Mount Cross-Face 37:52 +

Volume 2

Introduction to Mount – Introduction 0:00 – 0:42
The Principle of Association and Disassociation 0:42 – 1:41
The Neck is Designed for Movement 1:41 – 3:01
How to Leverage the Practical Anatomy of the Shoulder to Maximize Control and Strangles 3:01 – 4:20
Staying Safe in Bottom Mount – Introduction 4:20 – 4:55
The Principle of Off-Balancing Opponents to Stay Safe 4:55 – 6:05
Using the Three-Quarter Bridge to Save Energy 6:05 – 7:30
T-Rex Arm + Neck Shrug = True, when Staying Safe 7:30 – 7:44
A Practical Example of the Three-Quarter Bridge 7:44 – 8:39
The Three-Quarter Bridge is Association in Practice 8:39 – 9:54
Controlling Low Mount – Introduction 9:54 – 10:33
Anatomical Mount – How to “Super Glue” Yourself to The Opponent So You Never Lose Mount Position 10:33 – 11:38
The concept of “Hide, Pinch and Hover” 11:38 – 12:44
The power of “tucking your hips under” 12:44 – 13:17
A Practical Example of the Anatomical Mount Concepts 13:17 – 14:55
A Brief Summary for When You’re Panicking and Don’t Remember What To Do 14:55 – 15:31
The Anatomy of Mount Frames – Introduction 15:31 – 16:00
The importance of levers when breaking mount frames 16:00 – 17:24
Disassociating the Elbow from the Torso and Controlling the Ribcage 17:24 – 17:53
Our main goal in top mount – Dividing the Upper and Lower Bodies 17:53 – 18:58
Breaking Mount Frames Part 1 – Using Hips & Lock Method – Introduction 18:58 – 19:29
The Hip Push Method of Breaking Frames 19:29 – 20:56
Introduction to The Lock Method of Breaking Frames 20:56 – 24:56
“Opening the Lock” Using Your Hands and The Reverse Palm Option 24:56 – 25:51
Summary of The Mount Position and Concepts of Breaking Frames 25:51 – 27:52
Breaking Mount Frames Part 2 – Using The Choke Threat & Leg Twist – Introduction 27:52 – 28:39
The importance of Applying Cross-Face Pressure in The Correct Direction 28:39 – 29:59
Threatening a Choke to Open The Mount Frame 29:59 – 31:26
Threatening The “Leg Twist” to Open The Mount Frame 31:26 – 32:26
Threatening The “Leg Twist” + “Lock Method” Combination to Open The Mount Frame 32:26 – 33:29
Summary of 4 Primary Ways of Breaking Mount Frames 33:29 – 34:53
The Strength of The Three-Quarter Bridge – Introduction 34:53 – 35:22
A Strong Cross-Face and Lock Break Prevents The Upa-Escape 35:22 – 36:45
The Principle of The Three-Quarter Bridge in Action 36:45 – 37:52
How to Use The Three-Quarter Bridge to Escape a Tough Mount Cross-Face 37:52 +

Volume 3

The Anatomy of a Choke – The Reason Why There Isn’t Such a Thing as “Air vs Blood Chokes” 0:00 – 1:13
Using the Correct Terminology – Strangle vs Choke 1:13 – 1:53
Firing off The “Alarm Bells” In the Neck to Maximize Strangles 1:53 – 3:05
The Anatomy of The 2-Finger Grip – Introduction to Section 3:05 – 3:42
Why a 2-Finger Grip Is The Strongest 3:42 – 5:24
A Time and Place for All Grips 5:24 – 5:52
A Practical Look at the Skeleton 5:52 – 6:54
When To Use 2-Finger Grip and When Not To – The Strength of the 2 Finger Grip Practical Demo 6:54 – 7:54
Opening The Collar to Make it Stronger 7:54 – 8:11
Why Using a 4-Finger Grip from the Back Is Not Optimal 8:11 – 8:46
When Not To Use a 2-Finger Grip 8:46 – 9:31
2-Finger Grip Allows for More Movement 9:31 – 10:33
The Alarm Bell Ezekiel Choke – Introduction 10:33 – 11:09
Controlling the Head, Neck and Shoulders for a Successful Strangle 11:09 – 11:41
Using the Chicken-Wing to Control Opponent and Assert 2-Finger Grip 11:41 – 12:17
Exposing the Neck for Maximum Strangulation 12:17 – 13:09
Two Secret Tricks to Maximize the Submission 13:09 – 14:25
The Torque Ezekiel Strangle – A step-by-step walk-through of the Torque Ezekiel Strangle 14:25 – 15:19
Take Away the Space and Strangle! 15:19 – 17:14
The Soul Crusher Ezekiel Strangle – A step-by-step walk through of the Soul Crusher Ezekiel Strangle 17:14 – 17:58
Let’s Crush Some Souls! 17:58 – 19:59
Use the head to prevent the opponent defending 19:59 – 20:29
The Soul Stealer Ezekiel Strangle -Introduction 20:29 – 20:56
Let’s Steal Some Souls! 20:56 – 22:44
Using The Elbow to Further Expose The Neck 22:44 – 23:47
A Quick Summary of the 4 Ezekiel Strangles 23:47 +

Volume 4

Principles of Escapes and Escaping the Alarm Bell Ezekiel Strangle – Introduction 0:00 – 0:53
The Principle of Reverse Engineering 0:53 – 1:36
Using the Free Arm to Protect the Neck 1:36 – 2:44
Trapping the Choking Arm When They Go Across the Neck 2:44 – 3:23
Breaking the Grip By Arm Pressure and Posture 3:23 – 4:03
What To Do If Your Shoulders Aren’t Flexible 4:03 – 4:52
Final Option: The Houdini Escape 4:52 – 5:54
A Summary of Escaping the Alarm Bell Ezekiel Strangle 5:54 – 7:35
Escaping the Torque Ezekiel Strangle – Introduction 7:35 – 8:23
The Importance of “Turning and Trapping” 8:23 – 9:17
Looking Above Your Head and Shoulder for the Most Efficient Escape 9:17 – 9:55
“ Look, Trap, Bridge and Roll” 9:55 – 10:11
Adding the “Swim” to get the “Kung Fu Escape” 10:11 – 12:51
A Summary of Escaping the Torque Ezekiel Strangle 12:51 – 13:52
Escaping the Soul Crusher and Soul Stealer Ezekiel Strangles – Introduction 13:52 – 14:29
Creating a Shoulder Frame 14:29 – 15:47
Creating the Shoulder Clamp to Prevent the Strangle and Get Ready to Escape 15:47 – 16:46
“Push, Swim and Pop” 16:46 – 17:09
Fine Tuning the Escape 17:09 +

Volume 5

A Brief Introduction to Skill Acquisition – Introduction 0:00 – 1:15
The Perfect Repetition Myth 1:15 – 2:46
Factors that Influence How We Learn and The Importance of “Repetition without Repetition” 2:46 – 4:04
Using External Tools to Constraint Movement in Order to Get Better Faster 4:04 – 5:48
Recognizing How You Learn Under Different Circumstances 5:48 – 6:23
The Importance of Positional Sparring Under Scaled Intensities 6:23 – 8:21
A Quick Summary 8:21 – 8:56
Mount Breaking and Staying Safe Games for Skill Acquisition – Explanation of the Games and Rules 8:56 – 12:00
Playing “Don’t Lose Your Balls!” 12:00 – 12:50
Playing “Don’t Lose Your Balls – Bean Bag Edition!” 12:50 – 14:09
Stop Wrote Learning – Play and Explore! 14:09 – 14:52
Vary the Games to Vary the Skills 14:52 – 18:11
Escape Games for Skill Acquisition – Playing “Small Sided BJJ” with Eyes Closed 18:11 – 21:22
Playing “Small Sided BJJ” with Bean Bags 21:22 – 22:31
The Importance of Recognizing the Downfall of Gripping an Object 22:31 – 23:04
The Role of Play and Exploration in Getting Better at BJJ 23:04 +
0
    0
    Your Cart
    Your cart is emptyReturn to Shop